Photo thanks to ...
[email protected]

Related Local Links:
Hasselblad 500el/elm battery
Hasselblad Notes
Hasselblad on a Budget Guide
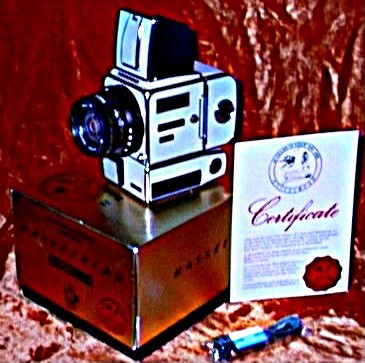
This 500 EL/M Hasselblad camera (see photo) is particularly interesting as an example
of a collectible Hasselblad, one related to the use of similar models
during the U.S. Apollo missions in space and on the moon. The
automatic motor drive offers many advantages over a manual wind
camera, whether you are wearing a space suit or not!
Hasselblad EL/ELM series cameras are among the lowest cost
motor drive cameras in medium format, often available for circa $300-350 US$ for the body
with charger. You can make your own DIN plugs (see Notes) for
remote or radio control setups. With a low cost Chrome C 250mm lens (and 2X), you can
have a very nice remote telephoto setup.
The big use of many of these motorized body setups was in photo studios, with a
remote or hand control to trigger the camera/strobe setup. The photographer
could engage the portrait subject, and shoot when the right facial expression was
seen.
While you could take an EL/ELM into the field, it adds about a pound to the
camera system weight for the motor and battery. The motor is also a bit bulky and projecting.
On the other hand, if you get a great deal on the camera, and have some spare DIY battery
packs, you could easily use it in the field and the studio.
The biggest problem reported with most EL/ELM bodies is failure of the nicad rechargeable
batteries. Fortunately, there are low cost replacement alternatives out there (such as 9
volt batteries with adapters). Or see our ELM battery DIY tips
pages!
Hasselblad 500ELM "G R A Y" R A R E.!! (20 Years in Space: 1962 to 1982) Special Edition (only 1,500 Made) with Carl Zeiss Planar 80mm 2.8 C T* Lens and A-12 Back in Box with Certificate. Outfit comes with a Shoulder Strap. G R A Y COLOR instead of Black (a metal plate mounted on the left side of the camera) to Commemorate 20 Years in Space (this camera is NOW 16 years old since released - Very Hard to Find.
[Ed. note: great tips from a noted Hasselblad repair tech and author of DIY Back Repair Manuals..] Date: Mon, 02 Sep 2002 From: [email protected] Subject: Re: [HUG] Re: hasselblad V1 #1692 > > The reason this has to be done by a tecnician is that there are shims under > > each corner of the screen, Wrong. There are no corner shims :) and they have to be aligned by someone who has the > > correct gages. Wrong. If you have ever seen a screen for the C that is new, you would see included instructions for doing it yourself. :) If you tried to do it yourself you might get it right by > > accident, but you would probably have no way of checking the alignment if it > > were wrong. This is a very simple job :) Remove the old screen and put in the new. Run the 4 screws down until they are snug. With your lens set at infinity, put a lupe on the screen (any corner), and run the screw either up, or down, until you have a sharp focus. Do this on each of the 4 corners. When done, do it again. YOU ARE FINISHED AND HAVE SAVED YOURSELF SOME MONEY! :) Dick
From hasselblad mailing list: Date: Mon, 2 Sep 2002 From: Austin Franklin [email protected] Subject: RE: [HUG] Re: hasselblad V1 #1692 ... Dick, Just be sure not to tighten the screws TOO much, as you will snap the corner of the screen off. I find MANY of these cameras with the corners of the screens snapped off...and it stinks, because the screens for the earlier cameras (1000 and 1600) are VERY hard to fine. A word of caution... AustinEnd of Page